Inserting Images


Inserting Images in LaTeX
Images are often needed to clarify explanations in articles, reports, worksheets, and scientific writing. In , you can insert external image files and then control their size, position, rotation, and relationship to surrounding text.
Basic Requirements
Before inserting an image, keep these points in mind:
- add the
graphicxpackage in the preamble, - store the image file in the same folder as the document or use the correct path,
- use
\caption{...}when the image needs a caption.
\usepackage{graphicx}If you are working in Overleaf, upload the image file into the same project first.
[

Inserting a Single Image
The simplest example looks like this:
\begin{figure}[h]
  \centering
  \includegraphics[width=0.5\textwidth]{image.png}
  \caption{Example image}
\end{figure}
[

Inserting Two or More Images
To show multiple images in one section, you can place multiple \includegraphics commands together.
\begin{figure}[h]
  \centering
  \includegraphics[width=0.35\textwidth]{image1.png}
  \includegraphics[width=0.35\textwidth]{image2.png}
  \caption{Two images in one figure}
\end{figure}
[

Resizing Images
Common options include:
\includegraphics[scale=...]{image}\includegraphics[width=...,height=...]{image}\includegraphics[width=...]{image}\includegraphics[width=\textwidth]{image}
Example:
\includegraphics[width=0.6\textwidth]{image.png}Rotating Images
You can rotate an image with the angle option.
\includegraphics[width=0.4\textwidth,angle=45]{image.png}[
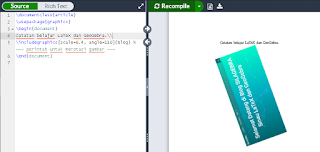
Image Alignment
To control spacing between images, you can use horizontal and vertical spacing commands such as \quad or \baselineskip.
\includegraphics[width=0.3\textwidth]{image1.png}
\quad
\includegraphics[width=0.3\textwidth]{image2.png}
[
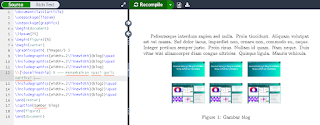
Image Position in the Document
Images are usually placed inside the figure environment.
\begin{figure}[h]
  \centering
  \includegraphics[width=0.5\textwidth]{image.png}
  \caption{Image at a chosen position}
\end{figure}
[

Common placement options for \begin{figure}[...]:
h: heret: topb: bottomp: special float page!: force the placement more stronglyH: place it exactly here, usually with thefloatpackage
For alignment:
\centeringcenters the image,\flushleftaligns it left,\flushrightaligns it right.
Multiple Images with Subfigures
If readers need to compare several images, use subfigures or subcaptions.
\usepackage{subcaption}

\begin{figure}[h]
  \centering
  \begin{subfigure}{0.45\textwidth}
    \includegraphics[width=\linewidth]{image1.png}
    \caption{First image}
  \end{subfigure}
  \begin{subfigure}{0.45\textwidth}
    \includegraphics[width=\linewidth]{image2.png}
    \caption{Second image}
  \end{subfigure}
  \caption{Two subfigures}
\end{figure}
[

Image and Text with Minipage
To place an image beside a block of text, minipage is a practical option.
\begin{minipage}{0.45\textwidth}
  \includegraphics[width=\linewidth]{image.png}
\end{minipage}
\hfill
\begin{minipage}{0.45\textwidth}
  Write the explanation here.
\end{minipage}
[

Alternative: wrapfig
If you want text to wrap around an image, use the wrapfig package.
\usepackage{wrapfig}

\begin{wrapfigure}{r}{0.4\textwidth}
  \includegraphics[width=\linewidth]{image.png}
\end{wrapfigure}
[

Closing
Those are some of the most common ways to insert images in . With graphicx and supporting environments such as figure, subfigure, minipage, and wrapfig, image layout becomes much more flexible and easier to manage.